
この記事では、setAttributeを使って属性を操作していきます。
setAttribute
setAttributeは指定した要素に属性を追加する、または既存の属性を変更します。
使い方
setAttribute('属性の名前', '新しい属性')という形式で使用します。
属性の追加
下記のソースコードにclassを追加してみます。
追加するのはbtnクラスです。
<a href="https://web-tsuku.life/" id="sample">ウェブつく</a>.btn {
background-color: blue;
color: white;
border-radius: 3px;
padding: 5px;
text-decoration: none;
}var sample = document.getElementById('sample');
sample.setAttribute('class', 'btn');sample.setAttribute('class', 'btn')によってclassを追加しています。
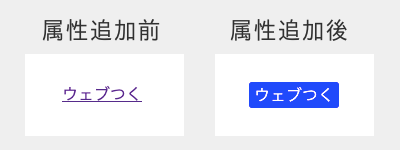
class追加前と追加後では下記のように表示が変わります。
属性の変更
属性の変更も同じようにできます。
<a href="https://web-tsuku.life/" id="sample">ウェブつく</a>var sample = document.getElementById('sample');
sample.setAttribute('id', 'sample2');上記のように指定することで、id名が上書きされ、変更されます。
変更後のソースコード↓
<a href="https://web-tsuku.life/" id="sample2">ウェブつく</a>setAttributeのデモ
それではsetAttributeを使ったデモを作ってみます。
「ラジオボタンの選択肢によって表示画像を変える」というプログラムです。
サンプルコード
<label><input type="radio" name="sample" id="a" onclick="changeImg(this)">画像Aを表示</label>
<label><input type="radio" name="sample" id="b" onclick="changeImg(this)">画像Bを表示</label>

<!-- デフォルト画像を表示 -->
<img src="https://web-tsuku.life/wp-content/uploads/2019/06/setattribute-default.png" id="target">
function changeImg(radio) {
var radio_id = radio.id;
var target = document.getElementById('target');
target.setAttribute('src', 'https://web-tsuku.life/wp-content/uploads/2019/06/set_attribute_' + radio_id + '.png')
}サンプルコードでは、選択されたラジオボタンのidを取得し、setAttributeで画像のsrcを変更しています。
画像ファイル名にidを組み込み、表示ファイル名を変更しています。